Starting bird photography, I always worked to frame birds in the center of the picture. This made sense due to the camera’s autofocus feature, which placed the focus markings in the middle of the viewfinder, making centering the bird easy. After taking many pictures this way, I started getting serious about framing after looking at the work of other photographers and taking a course by Melissa Groo covering beginner photography tips.
When framing birds in a photograph, the goal is to give the bird ‘room’ in the picture, depending on its gaze. This concept became clearer as I observed birds more carefully through the viewfinder. Despite making numerous framing mistakes that couldn’t be fixed during post-processing, I continued to practice. This consistent practice eventually improved my skills, giving my photographs a more “advanced bird photography” appearance.
What am I trying to do differently?
Working to size up the bird and its surroundings quickly
I try to consider the context of where the bird is coming from, where it’s resting, and where it might be going. For example, if I see a bird landing on a tree branch, I’ll try to determine the direction from which the bird came, how it’s positioned on the branch, and if it looks like it’s only a quick visit. I’ll also look for background distractions like branches and try to position myself so they don’t impact the picture. Also, based on the bird’s distance, I will adjust the zoom accordingly.
Watching what the bird is doing and reacting accordingly
Here, I determine if the bird is looking for food, eating, traveling with another bird, singing, or doing other activities. Based on this, I see if the activity will create a unique photograph. For example, if a bird lands on a branch with an insect in its mouth, I will photograph it, anticipating the bird might eat it, creating a unique photo. I’ll also try to allow space in the frame to capture the activity without crowding the picture. I’m also watching if the bird quickly changes direction on the branch and if a new position would create a better picture.
Tracking the bird’s head and eyes
The eyes of the bird are important for creating an engaging photograph. I’ll watch the bird’s head to see if one’s head position provides better visibility to the eyes. I can frame the picture accordingly based on the head position and eyes.
Take several shots of the bird, or more, if possible
Unfortunately, since birds won’t pose for me, I try to consider the above and take as many pictures as possible. I might adjust the zoom level to allow for better framing or adjust the framing based on where the bird moves. The burst mode on my camera allows me to do this easily, but I often take the pictures one at a time as I see the bird’s head and eyes move or the bird move positions in the frame.
Here are some examples with some subtle differences between each picture:
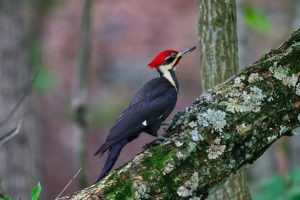
Pileated woodpecker at the center of the frame.
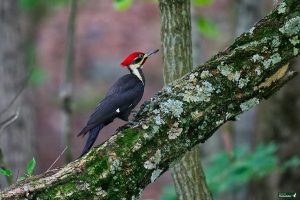
The bird is left of the center, looking up at the branch.
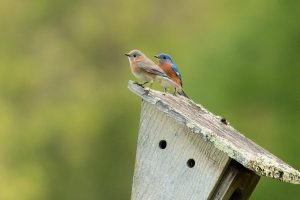
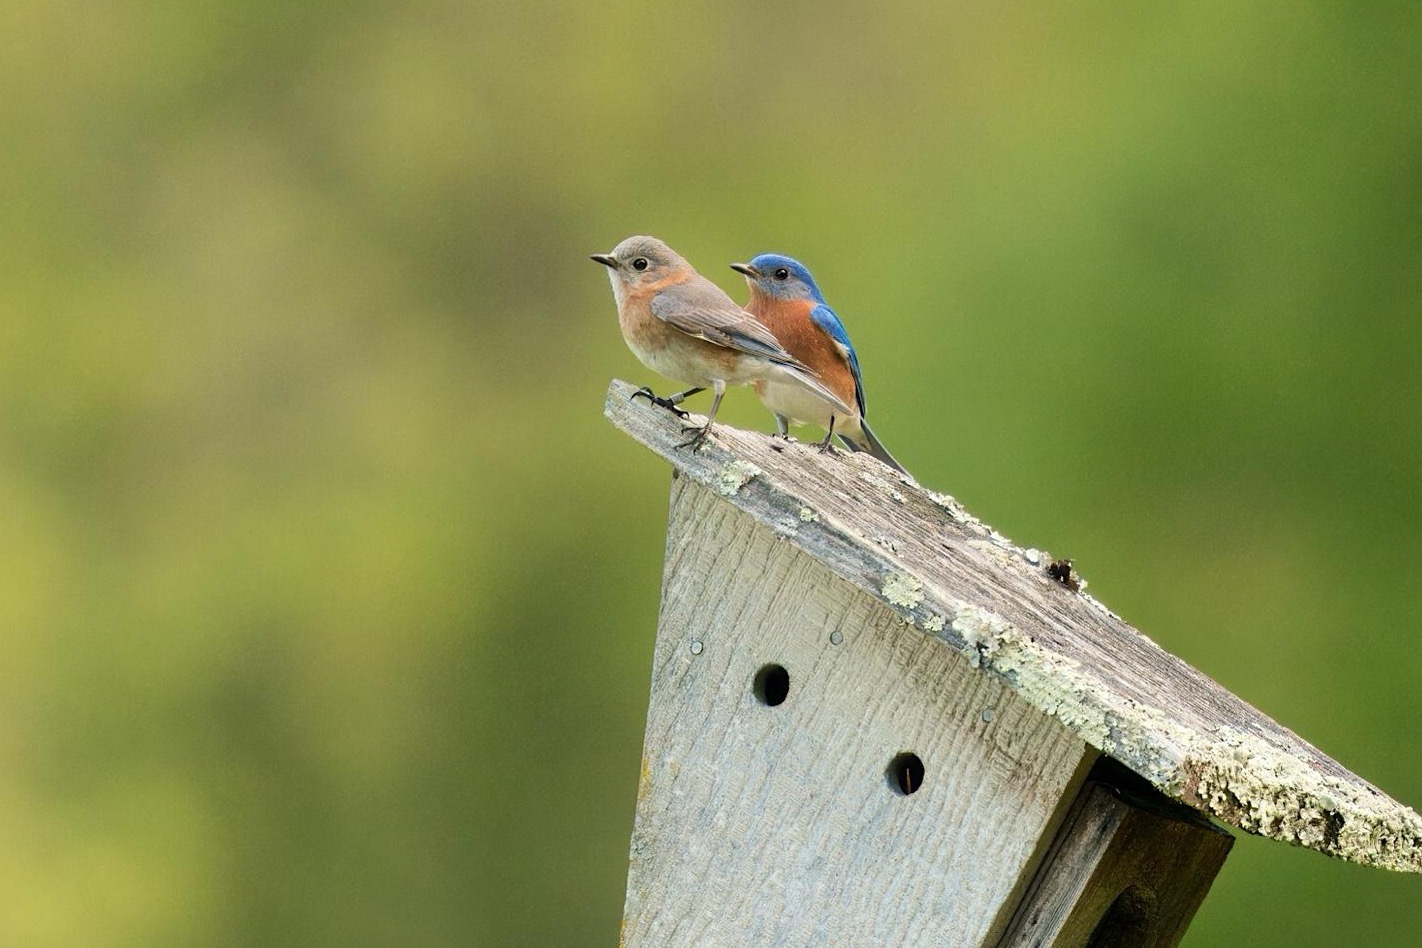
Two bluebirds at the center of the frame.
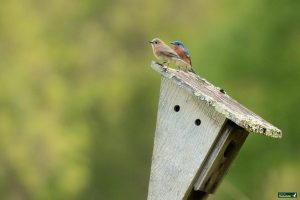
The photo places the birds right of center to allow more space in the direction of their gaze.
Summary – Framing Birds in Photographs
As I get more practice, I believe my framing skills will improve, but the above tips are what I’ve learned so far by taking thousands of bird photos. One of the reasons I take pictures of more common birds is to work on my observation and framing skills. I’ll continue to work on these skills to improve the quality of my pictures. Finally, refer to these bird photography ethics tips when taking pictures in the field.
0 Comments